Pixel fonts and text
Design your own pixel font inside Rastrivo Studio, then type with it straight onto your art: titles, dialogue boxes, scores, signs. Any font installed on Windows works too.
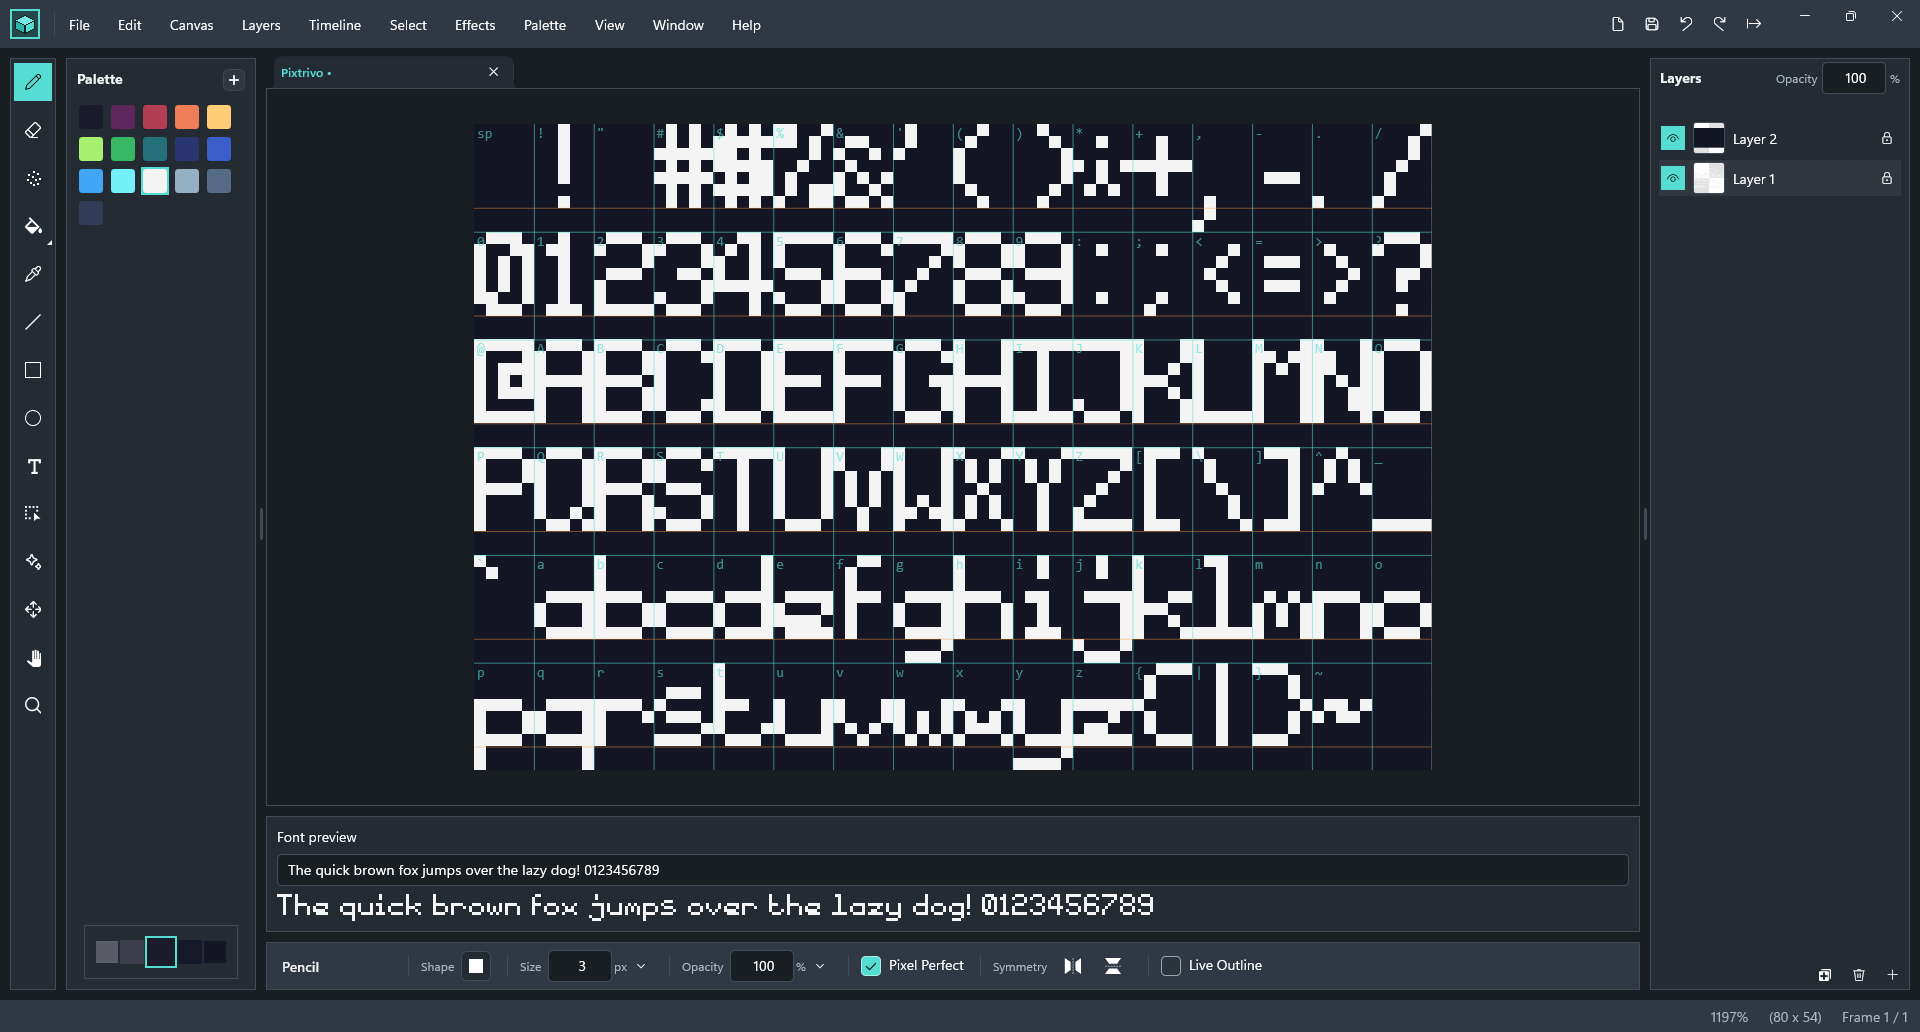
1. Start a new font
Choose File → New → Pixel Font…, give the font a name and set the cell size: the box each character is drawn in (anything from 3 to 64 pixels, 8 × 8 to start). Pick a cell big enough for your tallest letters, including the tails on g, j, p, q and y.
You get a canvas laid out as a grid of cells, one for every character: letters (upper and lower case), numbers, punctuation and symbols. Guides show which character goes in each cell.
2. Draw the letters
Draw each character in its cell with the normal tools. A few things happen automatically:
- Letters get their own width. Each character is trimmed to the pixels you drew, so a narrow i takes up less room than a wide m. It doesn’t matter where across the cell you draw, and you don’t need to leave gaps.
- Empty cells are left out. You don’t have to draw every character. Start with capitals and numbers if that’s all your game needs.
- Colours are kept. Draw outlines, shading or a gradient into the letters and they’ll appear in your text exactly like that.
A live preview of your font appears while you work, so you can see how real words look as you draw.
3. Fine-tune the spacing
With the font open, choose Canvas → Font → Font Settings…:
- Baseline: how many rows sit above the line the letters stand on. Tails on g, j, p, q and y hang below it.
- Letter spacing: the gap in pixels between characters. 1 suits most pixel fonts.
- Space width: how wide the space between words is.
4. Add it to your font library
Choose Canvas → Font → Add to Font Library. The font now appears in the Text tool in every document, marked (Rastrivo Studio).
Keep the font document. If you change it later and save it, the copy in your library updates as well.
5. Type with the Text tool
- Pick the Text tool and choose a Font in the options bar.
- Click on the canvas where the text should go.
- Type your text in the box (press Enter for a new line), check the preview, then click Place.
The text goes on its own new layer, named after what you typed, so you can move it, recolour it or delete it without touching your art.
- Foreground colour: tick it to draw a pixel font in your current colour instead of the colours it was designed with.
- Line spacing: pixels between lines when your text has more than one line.
- Windows fonts: every font installed on your PC is listed too, drawn as crisp pixels with no blurry edges. Set their Size in pixels. Pixel fonts always draw at the size you designed them.
Tip: to remove a font from your library, choose it in the Text tool and click the bin button next to the font list. The font document itself isn’t touched, so you can add it back any time.
Quick reference
| New pixel font | File → New → Pixel Font… |
|---|---|
| Baseline and spacing | Canvas → Font → Font Settings… |
| Use the font in other documents | Canvas → Font → Add to Font Library |
| Type text | Text tool, then click the canvas |
| Recolour a pixel font | Text tool → Foreground colour |
| Remove a font from the library | Text tool → bin button next to the font |

Try every feature free for 30 days
No account, no watermark, no limits during the trial. If you love it, it’s a one-off purchase. No subscription, ever.